Price Doctor
How to use the extension and new build design tool in Price Doctor
The extension and new build design and pricing tool in another unique feature to the Price Doctor system. Essentially, the tool allows you to design an extension or new build property using a simple drag and drop system.
As you drag in and resize rooms and features such as doors and windows, the system works out the price for you based on the rooms that you add and any features added to them.
Additionally, you can also define the types of bricks, blocks or roof tiles, numbers of lights and sockets per room, the type of finish per room, heating options, roof design, set labour and materials markups and profits and much more.
Using the design tool is best done on a desktop or laptop computer as, as good as the system is, designing a full 2 story new build home is a tricky and detailed job even when done on a laptop, let alone trying to do it on a tablet or mobile phone!
The design tool is a comprehensive piece of kit so for the purposes of this tutorial we will take you through all of the basics to get you going:
- Step 1 To access the design tool you must first have a quote for the proposed work. To do this, first create an enquiry (see our enquire tutorial here) and then follow your enquiry through to quote level. Once at quote level, click on the “Quotes” tab and then locate the quote you would like to access the design tool for and then click on View Quote
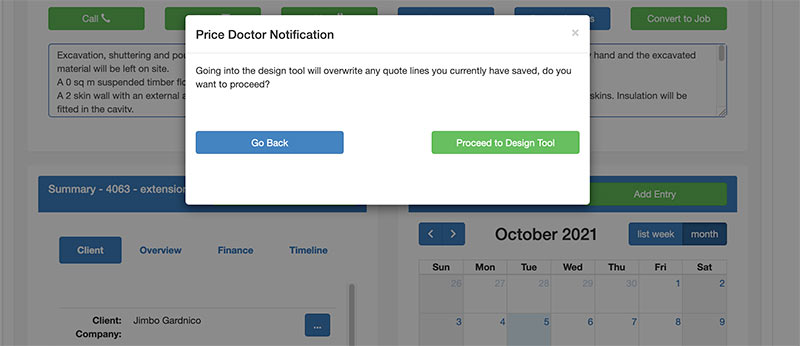
- Step 2 Once you are in the “Quote Overview” section scroll down a little and then click on the View Design button and then in the popup window “Proceed to Design Tool”
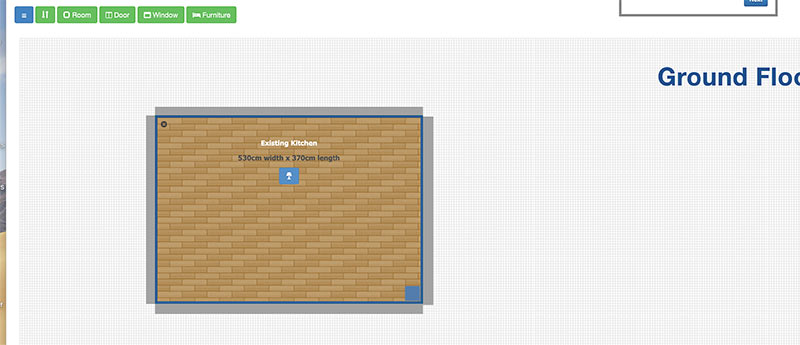
- Step 3 When you access the design tool you will see a canvas area and an initial design of teh existing property. The first job is to define the precise size of the existing property. You can resize the existing property by clicking and holding on the “handle” in the bottom right corner of the existing property and then simply dragging it as required
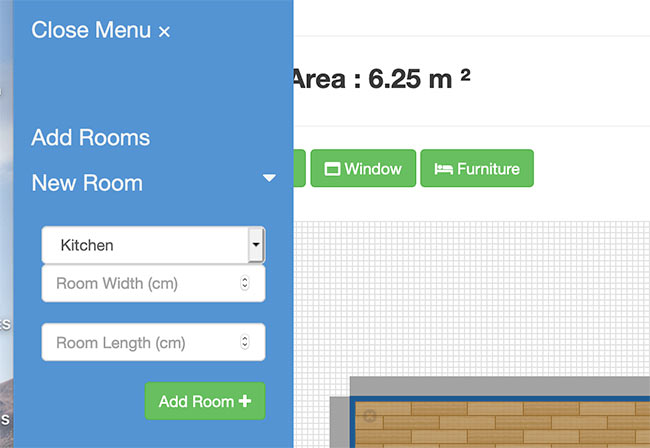
- Step 4 To start designing your extension, first click on the Room button on the top left menu at the top of the screen
- Step 5 Once clicked a menu will then appear. Click on the Select Room Type drop down and select the type of room you want to create from the list. Once done click on Add Room. If you know the dimensions you can state these also, or you can simply drag it out to size on the canvas
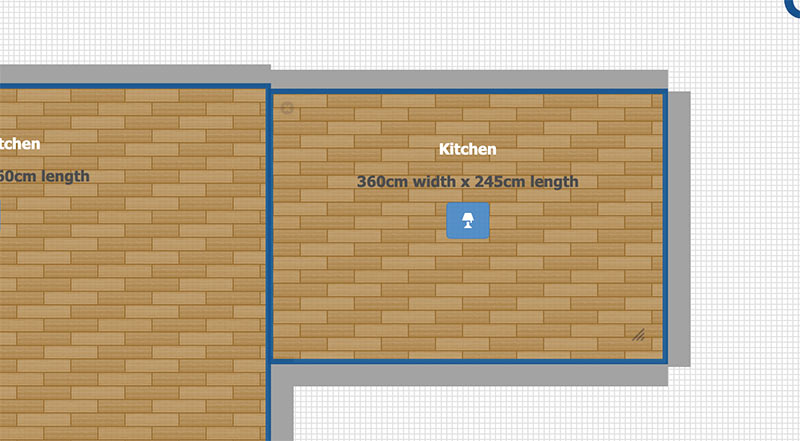
- Step 6 With your new room created, click and hold anywhere within the new room and drag it over to meet the existing property and butt the blue boundary walls together. Once done you will the grey boundary wall reshape to encompass the new structure. Drag the size of your extension out as required to the correct size. The dimensions are shown within the new room
- Step 7 With the new extension room resized, you can then see the total cost, floor area and number of construction days of your extension stated at the top of the screen
- Step 8 The next job is to add any features required such as doors, windows etc. To do this, click on the Door button on the top left menu and then a menu will appear listing all the different types of doors within the system. Click on the type of door you want e.g. “Internal Doors” and then select your door type by clicking on the image
- Step 9 Once added you should then see a door appear on the canvas. Click and hold your mouse on the door on the canvas (the cursor will turn into a crosshair symbol) and drag it to where you want it to go. If you need to go on your extension. If you need to rotate it, click on the “arrow” at the top of the image. If you want to remove it, click on the “X”
- Step 10 Add any further features such as windows, stairs or additional door using the same methods as above
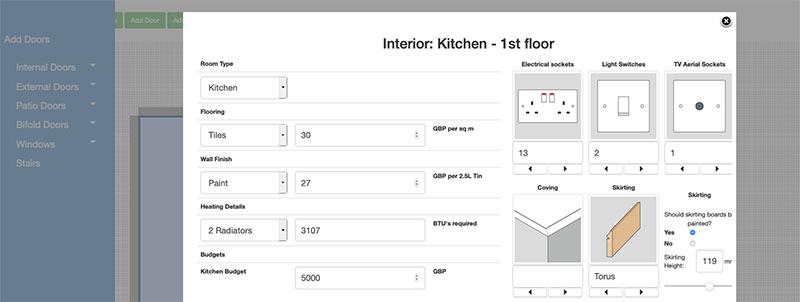
- Step 11 With the major features added you can now start to add in any internal features, fixtures etc. To do this, click on the “Blue Lamp” symbol in the middle of the room and a popup window will appear listing all of the options that can also be added such as wall and floor finish, heating options, numbers of sockets and light switches etc. Add any relevant options as required
- Step 13 With the above completed and the majority of all of the internal and main construction details and items defined, the next job is to define the major construction details. To do this, click on the “Construction Details” tab at the very top of the screen
- Step 14 Once in the Construction Details tab you will see many additional options for foundations, external wall type, internal wall type, insulation, ground floor construction and much more. Work your way through all the option, changing as required
- Step 15 With all of your construction details set, your final price should be pretty much there, bar any tinkering you wish to do to any options. Once final adjustments have been made, click on the “Breakdown” tab at the top of the screen. The “Breakdown” view gives you all of the final costings per construction stage, the final total cost and any further details you need to know concerning the calculation of costs. To see all of the details for a given stage, click on the name e.g. “Excavations & Foundations”. The section will then expand showing the relevant details
- Step 16 With your project now totally costed and all options selected you can now click on the “Project Pricing” tab. The Project Pricing tab shows an easy to read cost breakdown chart that allows you to quickly see what percentages of materials, labour, plant and profit/markups make up the total cost. If you scroll to the base of the page you can also define all “Markups” used by the system including labour, materials and plant. These can be defined as a fixed value or percentage of the pre-profit total price. You can also assign individual markups to labour, materials and plant.
- Step 17 One other vey useful feature in this area is the “Cost Calibration” section. By clicking on the heading name of each item this will expand a list of every item under this heading including prices that can be adjusted on the fly
- Step 18 Once you have completed all of your designing pricing work using the designer, to return to your “Quote Overview” area, click on the Return to Project button. Once you have clicked this button you will then be taken back to the quote view

Access the quote you want to use the design tool for
Access the design tool
Design tool canvas

Add room button
Create and resize a new room
Butt rooms together
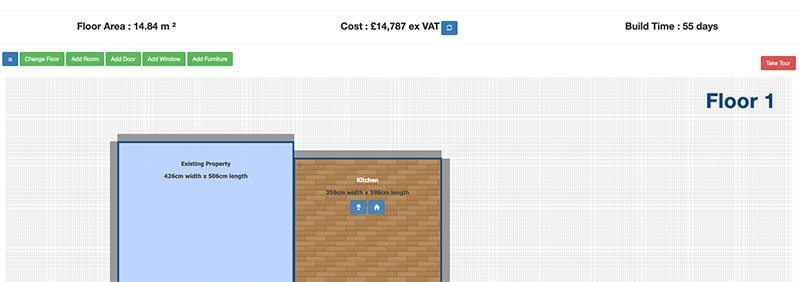
Resized extension room, cost, floor area and build time
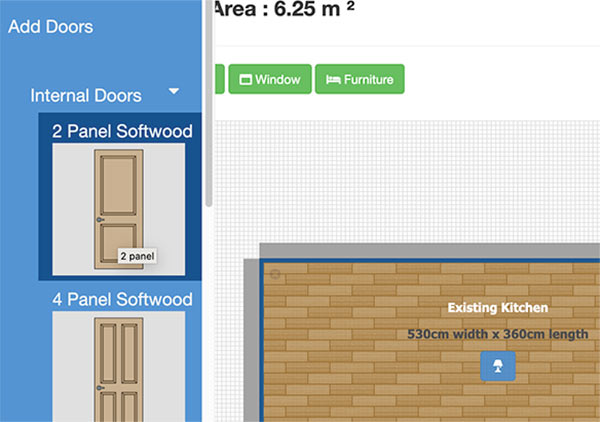
Adding a door to your design
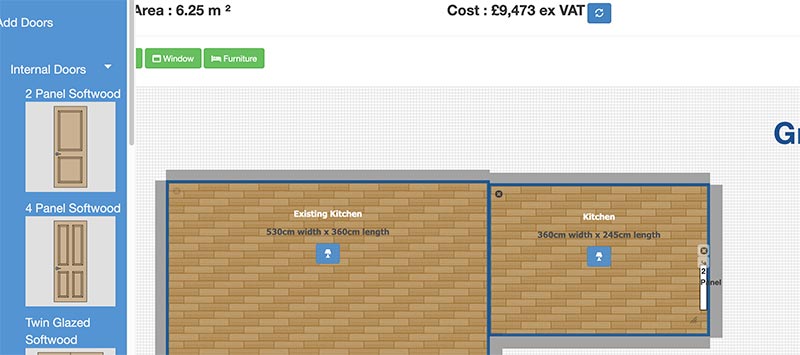
Positioning the door on the design canvas
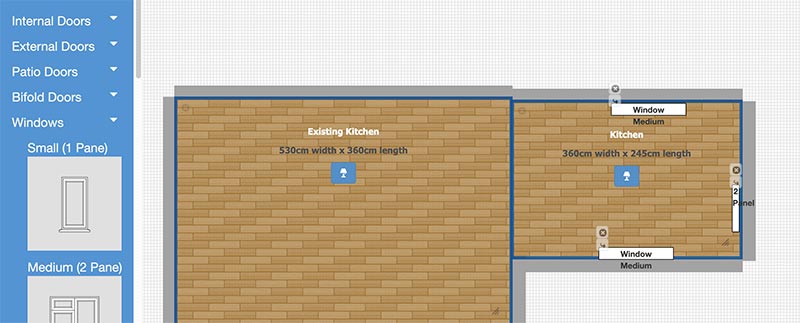
Add additional windows and other features
Add additional windows and other features

Click on Construction Details tab
Note: Depending on the type of account you have e.g. home or trade, the construction details tab will display differently. With a home account you will only be able to change the options but with a trade account you will also see a full breakdown of all the elements that make up the option e.g. for “External Walls” you will see total quantities of materials, labour rate and total projected costs
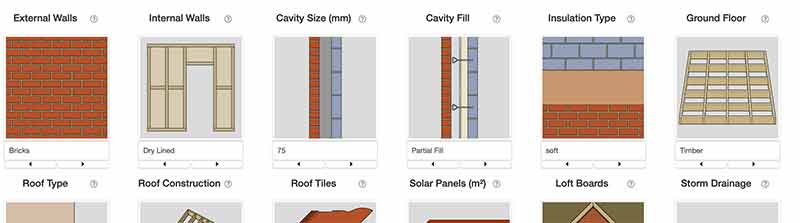
Construction details view in design tool
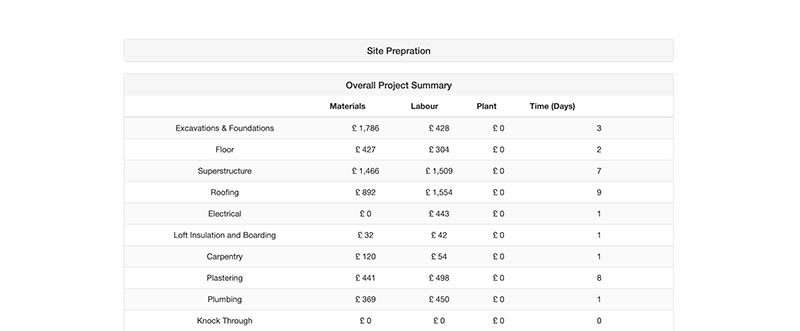
Breakdown details for excavations and foundations – Trade account view
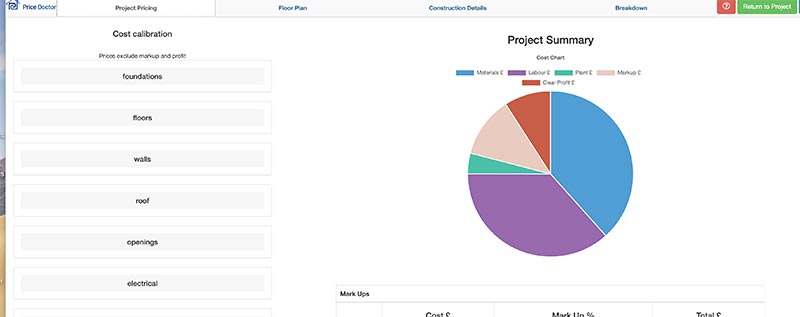
Project summary tab allows you to set profits and markups, see cost breakdown and select price lists
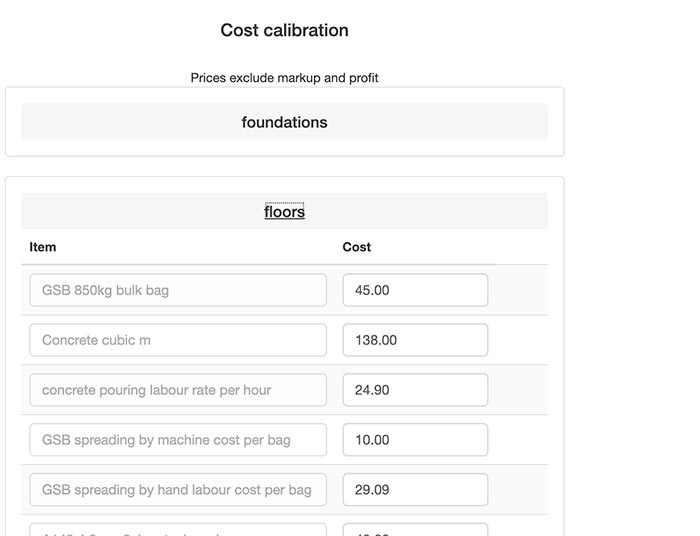
Cost calibration section in project pricing section
The above steps provide all you need to know about using the design tool to design a project and cost it at the same time. There are a few points to note:
- The design system cannot be used for any custom quotes you have created yourself using the steps described in this tutorial, it can only at this stage be used for extension and new build projects. We have plans to enable this feature at some point down the line however
- The design tool cannot be used for some of the smaller systems including driveways, patios, decking etc. These systems have their own pricing methodology
- The design tool at present can only cost up to a 2 storey extension/property e.g. ground floor, first floor. Plans to allow the adding of further floors are on the list and will be introduced down the line
Footer
A DIY Doctor solution